

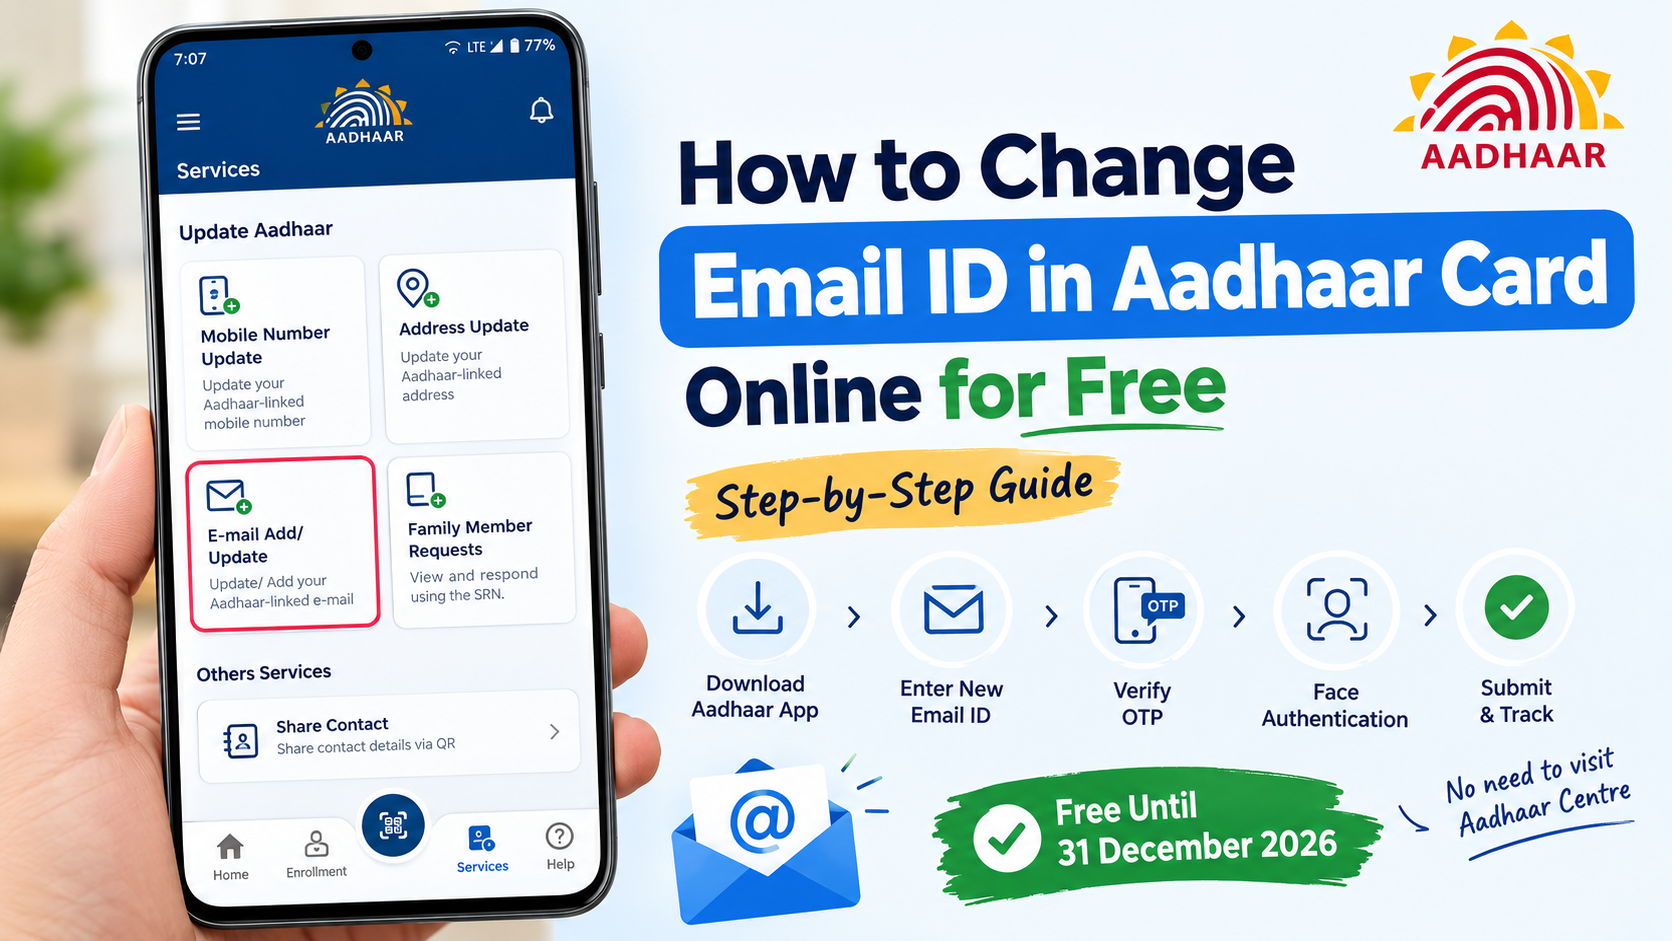
If you want to change or add your email ID to your Aadhaar Card, you can now do it online using the official Aadhaar App without visiting an Aadhaar Seva Kendra.
UIDAI has introduced a facility that allows Aadhaar holders to add or update their email address directly through the Aadhaar App. The service is free through the Aadhaar App from July 1, 2026, to December 31, 2026.
In this guide, we will explain how to change email ID in Aadhaar Card online for free, including how to install the app, enter your new email address, verify the OTP, complete face authentication, and track the update request.
Important: The free email-update facility is specifically available through the Aadhaar App during the current waiver period. It is not the same as updating Aadhaar documents through the myAadhaar website. UIDAI's official announcement says the email-update charge is waived through the Aadhaar App until December 31, 2026.
Is It Possible to Change Email ID in Aadhaar Online for Free?
Yes. As of 2026, UIDAI allows Aadhaar holders to add or update their email ID through the official Aadhaar App.
The Government's Press Information Bureau reported that UIDAI enabled free email updates through the Aadhaar App from July 1, 2026, for a six-month period. The service does not require a visit to an Aadhaar centre.
The current free period is:
Detail | Information |
|---|---|
Service | Aadhaar Email ID Update |
Method | Official Aadhaar App |
Fee | ₹0 during the waiver period |
Free period | July 1, 2026 – December 31, 2026 |
Aadhaar Centre Visit | Not required for the app-based process |
Verification | Email OTP + Face Authentication |
Platform | Android and iOS |
UIDAI's June 2026 office memorandum confirms that the usual ₹75 email-update charge was waived for the Aadhaar mobile application from July 1 to December 31, 2026.
What You Need Before Updating Your Aadhaar Email ID
Before starting the process, keep the following ready:
Your Aadhaar number
A smartphone
The official Aadhaar App
An active mobile number for Aadhaar authentication
The new email address you want to link
Internet connectivity
Permission to use your phone's camera for face authentication
The Aadhaar App is available on both Android and iOS. UIDAI says Android users can download it through Google Play and iPhone users through the Apple App Store.
Step 1: Download the Official Aadhaar App
First, download the official Aadhaar App on your smartphone.
For Android Users
Open the Google Play Store and search for:
Aadhaar
Make sure you select the official Aadhaar application and not an unofficial third-party app.
[Image 1 — Aadhaar App on Google Play Store]
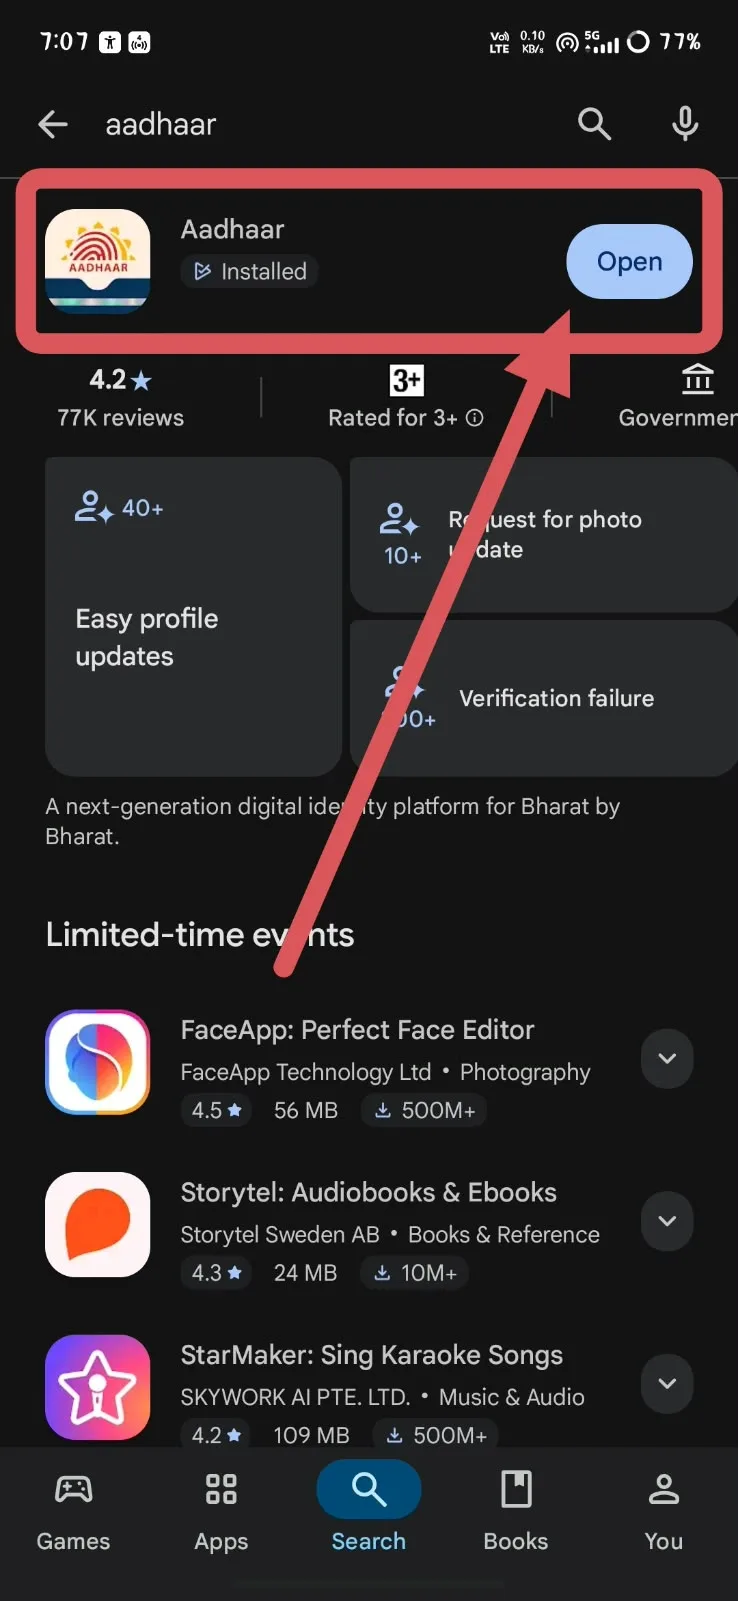
The screenshot above shows the Aadhaar App listed on Google Play Store with the option to open the application.
UIDAI confirms that the new Aadhaar App is available on Android and iOS.
Important Safety Tip
Do not enter your Aadhaar number, OTP, email password, or other personal information into an unknown Aadhaar-related application.
Always use the official Aadhaar App published through the official app stores.
Step 2: Open the Aadhaar App
After installing the application, tap Open.
If you are using the app for the first time, you may need to complete the initial registration process.
UIDAI's app onboarding process includes selecting your language, entering your Aadhaar number, accepting the terms and privacy policy, selecting the appropriate SIM, completing face authentication, and setting a six-digit PIN.
Once registration is completed, log in to the application.
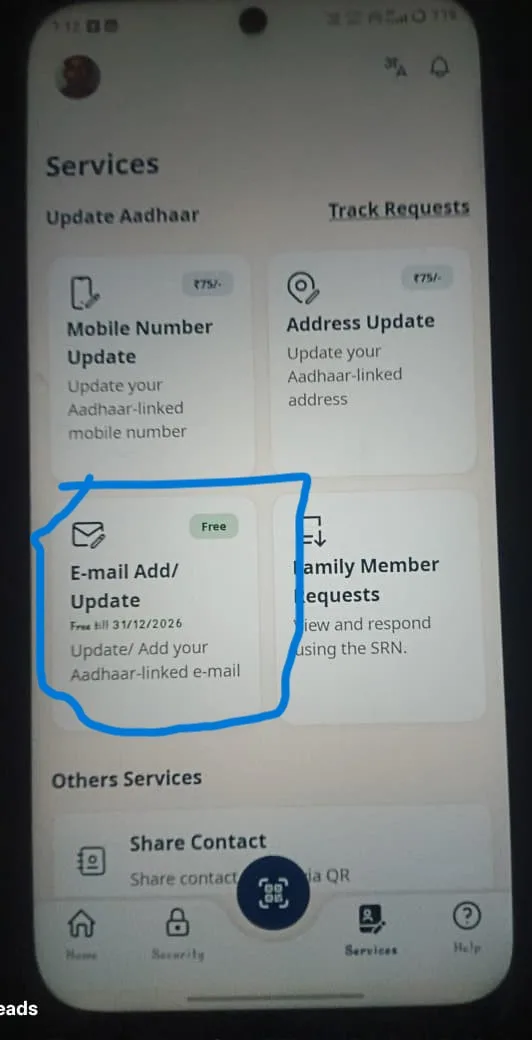
Step 3: Go to the Services Section
After logging in, open the Services section of the Aadhaar App.
You will see several Aadhaar-related services.
Look for the option:
E-mail Add/Update
In the screenshot below, the service appears under the Update Aadhaar section.
[Image 2 — Aadhaar App Services Screen Showing E-mail Add/Update]
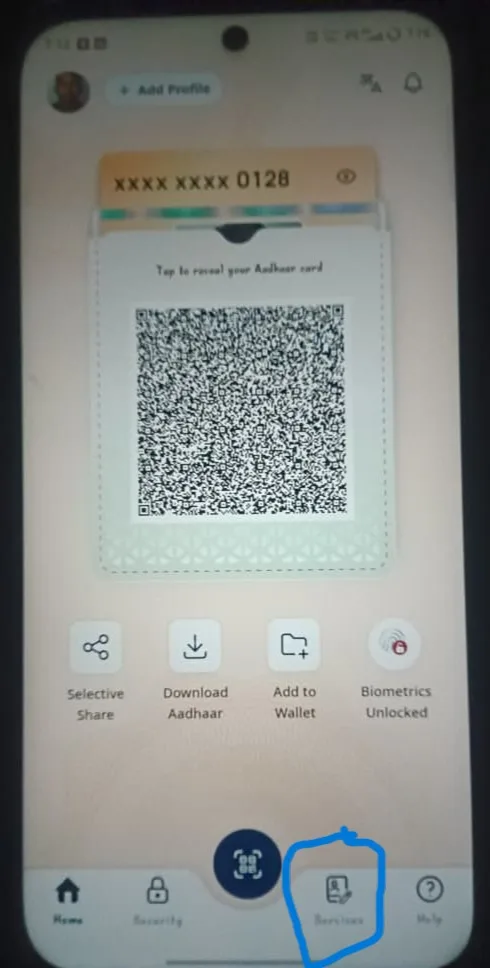
The screenshot shows other services such as mobile number update and address update along with the E-mail Add/Update option.
Tap E-mail Add/Update to continue.
Tip: If you do not see the email-update option, make sure you are using the latest version of the official Aadhaar App. UIDAI specifically advises residents to download or update the Aadhaar App to access the email-update feature.
Step 4: Enter Your New Email Address
After selecting E-mail Add/Update, the app will take you to the email-update process.
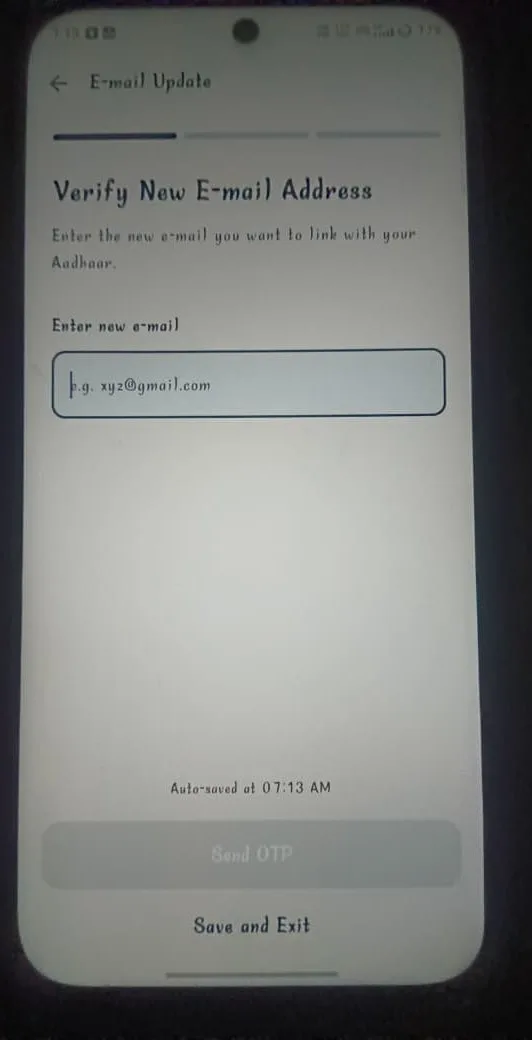
You will see a screen asking you to enter the email address you want to link with your Aadhaar.
Enter your new email address carefully.
For example:
example@gmail.com
[Image 3 — Enter New Email Address Screen]
The screen explains that you need to enter the new email address that you want to link with your Aadhaar.
Check Your Email Address Carefully
Before pressing Send OTP, make sure:
There are no spelling mistakes.
The domain is correct, such as
gmail.com.You have access to the email account.
You have not accidentally added an extra space.
The email account is active.
This is important because an OTP will be sent to the email address you enter.
Step 5: Send OTP to Your New Email
After entering your email address, tap:
Send OTP
The Aadhaar App will send an OTP to the new email address.
Open your email inbox and look for the OTP message.
Also check your:
Inbox
Spam folder
Promotions folder
Junk folder
if you don't immediately receive the OTP.
Step 6: Enter the Email OTP
Once you receive the OTP, return to the Aadhaar App.
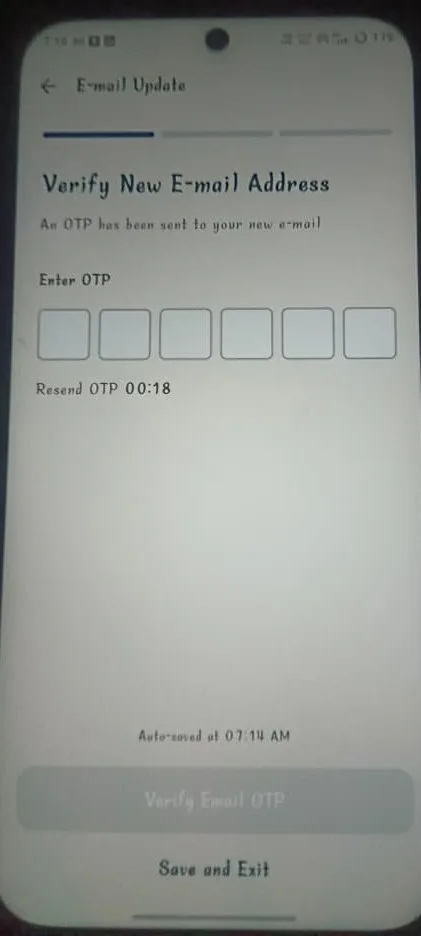
You will see a screen asking you to:
Verify New E-mail Address
Enter the OTP received on your new email address.
[Image 4 — Verify New E-mail Address Using OTP]
The screenshot shows six OTP boxes where the email OTP needs to be entered.
After entering the correct OTP, continue to the next step.
What if I don't receive the OTP?
If you don't receive the OTP:
Wait for a short time.
Check your spam or junk folder.
Confirm that the email address was entered correctly.
Use the Resend OTP option when it becomes available.
Make sure your internet connection is working.
Never share your OTP with another person.
Step 7: Review the Email Update Process
After email verification, the app may display a Process Overview screen.
This screen provides information about the Aadhaar email update request.
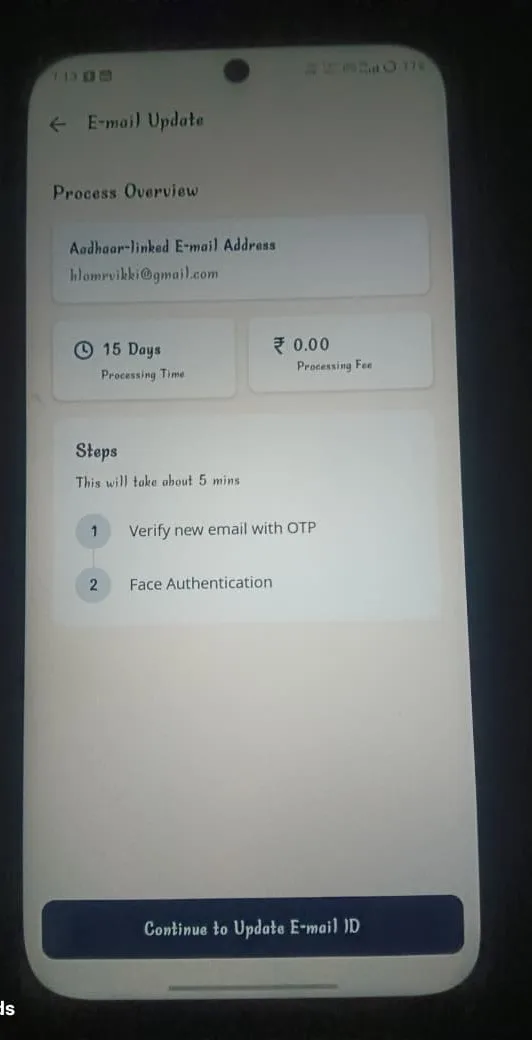
In the provided screenshot, the process overview displays:
Aadhaar-linked email address
Processing time
Processing fee
Verification steps
[Image 5 — Aadhaar Email Update Process Overview]
The screenshot shows a ₹0.00 processing fee and lists the following steps:
Verify new email with OTP
Face Authentication
The screen also indicates an estimated processing time of 15 days.
Does Aadhaar Email Update Take 15 Days?
The screenshot provided for this process shows 15 days as the processing time. However, processing times can vary, so treat this as an estimated timeline rather than a guaranteed completion time.
Once your request is submitted, use the app's request-tracking facility to check the status.
Step 8: Continue to Update Email ID
After reviewing the process overview, tap:
Continue to Update E-mail ID
The application will take you to the authentication stage.
Make sure your camera is working correctly because the next step involves face authentication.
Step 9: Complete Face Authentication
The Aadhaar App uses Face Authentication as part of the update process shown in the app.
Follow the instructions displayed on your phone.
You may need to:
Give the app camera permission.
Position your face inside the indicated area.
Keep your face clearly visible.
Follow the on-screen instructions.
Complete the face authentication process.
Tips for Successful Face Authentication
For better results:
Sit or stand in a well-lit place.
Keep your face clearly visible.
Avoid covering your face.
Keep the camera lens clean.
Hold your phone steadily.
Follow the instructions shown on the screen.
Do not try to use another person's face for authentication.
Step 10: Submit the Email Update Request
Once your OTP verification and face authentication are successfully completed, submit the request.
The Aadhaar App will process your email update request.
If the request is successfully submitted, you should receive an acknowledgement or request reference that can be used to track the update.
Step 11: Track Your Aadhaar Email Update
After submitting the request, you can use the Aadhaar App's Track Requests functionality to monitor your update.
The Aadhaar App provides request-tracking functionality along with other Aadhaar services.
Keep your request/reference number safely until the process is completed.
How Long Does Aadhaar Email ID Update Take?
The exact processing time can depend on the request and UIDAI's processing system.
In the screenshot provided for this process, the application shows:
Processing Time: 15 Days
Therefore, users should allow sufficient time for the request to be processed rather than expecting the email address to change immediately.
If the update remains pending beyond the displayed or communicated processing period, check the request status through the Aadhaar App or contact UIDAI.
Is Aadhaar Email ID Update Really Free?
Yes, during the current waiver period, email ID update through the Aadhaar App is free.
UIDAI's official memorandum states that the ₹75 charge for updating an email address through the Aadhaar mobile application was waived from July 1, 2026, to December 31, 2026.
The PIB also confirms that the email update is a free service through the Aadhaar App only during this six-month period.
Important
The word "free" in this article refers to the current Aadhaar App waiver.
The free period is scheduled to end on December 31, 2026, unless UIDAI announces an extension or another change.
Can I Update Aadhaar Email ID From the UIDAI Website?
The important distinction is between online Aadhaar services and the newly introduced Aadhaar App email-update facility.
For the current free email-update service, UIDAI specifically says to use the Aadhaar App. The PIB announcement describes the facility as an app-based service and says that residents can access it by downloading or updating the Aadhaar App.
Therefore, if your goal is specifically:
"How to change email ID in Aadhaar Card online for free?"
the recommended route during the current waiver period is:
Aadhaar App → Services → E-mail Add/Update
What If I Don't Want to Use the Aadhaar App?
You can also visit an Aadhaar Seva Kendra or authorised Aadhaar enrolment/update centre for Aadhaar demographic updates.
UIDAI's centre information lists email address among the demographic details that can be updated at an Aadhaar centre. The current listed charge for a standalone demographic update is ₹75.
However, if your objective is to update your email for free, the Aadhaar App is the relevant option during the current waiver period.
Why Should You Link Your Email ID With Aadhaar?
Adding a valid email address to your Aadhaar can be useful for receiving important notifications.
According to the government announcement, linking an email with Aadhaar can help residents receive real-time email notifications when an Aadhaar authentication request is executed. This can provide additional visibility into the use of your Aadhaar.
A working email address can therefore help you:
Receive Aadhaar-related notifications.
Stay informed about authentication activity.
Keep your Aadhaar contact information updated.
Receive important communication from UIDAI where applicable.
Aadhaar Email Update: Common Problems and Solutions
1. E-mail Add/Update option is not showing
First, check whether you have the latest version of the Aadhaar App.
UIDAI advises users to download or update the Aadhaar App to access the email-update facility.
Try:
Play Store/App Store → Aadhaar → Update
Then reopen the application.
2. Email OTP is not received
Check:
Internet connection
Email address entered
Spam/Junk folder
Email inbox storage
Resend OTP option
Do not repeatedly request OTPs in quick succession.
3. Face Authentication is failing
Try the authentication process again in a well-lit location.
Make sure:
Your face is clearly visible.
Your camera is clean.
You are following the on-screen instructions.
You have a stable internet connection.
4. Email Update Request Is Pending
A request may take time to process.
Use Track Requests in the Aadhaar App to check its status.
Avoid submitting multiple requests unnecessarily while the previous request is still being processed.
5. You Entered the Wrong Email Address
If you accidentally entered an incorrect email address, check the status of your request first.
If the request has not completed, follow the instructions provided by the app or UIDAI. If necessary, contact UIDAI support.
What Is the Difference Between Aadhaar Mobile Number and Email Update?
Your Aadhaar can contain both a registered mobile number and an email address.
They serve different purposes.
Feature | Mobile Number | Email ID |
|---|---|---|
OTP communication | Yes | Yes, where applicable |
Aadhaar authentication notifications | Depends on service | Can receive email notifications |
Update through Aadhaar App | Available | Available under current email-update facility |
Face authentication | May be required | May be required |
Current app-based email waiver | — | Free until Dec. 31, 2026 |
The Aadhaar App supports several digital Aadhaar services, including mobile number and address updates.
Important Safety Tips for Aadhaar Email Update
Aadhaar is sensitive identity information, so you should take care while updating your details.
Never share your OTP
UIDAI or another person should not need you to tell them your OTP over a phone call.
Use only the official Aadhaar App
Avoid apps or websites that claim they can update Aadhaar for you.
Don't share your Aadhaar details unnecessarily
Only provide Aadhaar information through official UIDAI channels.
Don't share your face-authentication information
Complete authentication yourself on your own device.
Keep your email account secure
Use a strong password and enable two-factor authentication on your email account where available.
Can I Add an Email ID to Aadhaar for the First Time?
Yes. The current Aadhaar App facility is not limited only to changing an existing email address.
UIDAI's announcement specifically says Aadhaar holders can add or update their email ID through the Aadhaar App.
So, if an email address was never linked with your Aadhaar, you can use the facility to add one, subject to the app's eligibility and authentication requirements.
Aadhaar Email ID Update Process at a Glance
Here is the complete process in simple form:
Download Aadhaar App
↓
Register/Login
↓
Open Services
↓
Select E-mail Add/Update
↓
Enter New Email ID
↓
Send OTP
↓
Enter Email OTP
↓
Review Process Overview
↓
Continue to Update E-mail ID
↓
Complete Face Authentication
↓
Submit Request
↓
Track Request Status
↓
Email ID Updated


Comments & Discussion
Leave a Comment
Share your questions, ideas, or architectural feedback. Your comment will appear immediately.
No comments yet
Be the first to share your thoughts or start a discussion on this topic.